
Brick and Soap Installation Guidelines
These handmade Danish pattern brick and soaps vary slightly in color. Use them at random so the color variations will be well mixed. This makes a good antique look.
Handmade brick vary in size also. These are about 4 1/4” x 8 1/2” or 9". Always make the space of one brick including the end and side joint be 4 3/4” x 9 or 9 1/2", letting the joint absorb any slight differences in the dimensions of the bricks.
To install the soaps, we recommend a mortar mix of one part gray Portland cement and four parts fine sand wetted with half water and half Acrylbond, or Acryl-60. This makes a strong waterproof bond. Wet the back of the soaps and the slab a little if necessary. Clean mortar from the top of the brick with a wet sponge as you go. Don’t let the mortar dry on the surface of the brick.
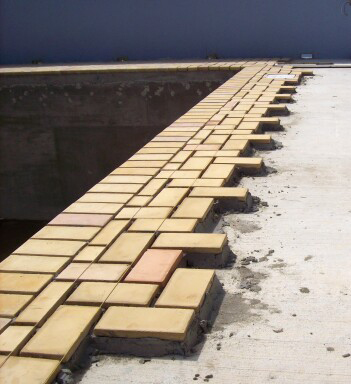
To
install the brick, the soap installation procedure can be used, or the
brick can be laid dry on a bed of manufactured sand mixed with 20% cement
in the top two inches. This is a similar procedure to the installation
of 2" thick tile without a slab. See "Tile Installations" under Tile and Pool Coping, above.
Before grouting the joints, seal the dry, installed brick surface by rolling on a coat of clear, penetrating siloxane sealer. This can be done a short time before grouting, (half hour), will give the best look, and save a great deal of time and labor. Make the grout from one part white cement, four parts fine sifted sand , a small amount of yellow cement coloring, (about one ounce for a five gallon bucket of mix), and some water. Don’t make it too thin. Put the thick grout mixture into the joints with the edge of your trowel, packing it in and leveling as you go. Follow up in a short time with a rodding tool. We use one made from a bent 1/2” PVC pipe. Clean any smears from the brick with a damp sponge. Don't let the grout dry on the surface of the brick.
The vehicular brick and regular Danish pattern brick can be laid without pouring a slab. Prepare the ground by enclosing the area with 6" blocks, or upright bricks, if it is not enclosed already. The blocks may need rebar driven into the cells for stability. Thoroughly tamp the dirt within the area, and top with manufactured sand to within 2" of the bottom of the brick (or paver). Fill the rest of the underlayment with a mixture of dry aggregate and cement (20% cement). Screed this topping level. Stretch strings to align one edge of the tile or brick. Placed the tile or brick on top of the dry sand and cement. When all the tile or brick have been placed, soak the area thoroughly with water and stay off the tile for a couple of days. Seal the dry tile or brick with siloxane sealer. Grout the seams with a grout colored the same as the tile. Seal the entire area once again thoroughly, and re-seal as necessary. Tile and brick need re-sealing when water darkens the surface.